Last week I did a post on 5 Ways to Refresh your Home (for cheap). That inspired me to refresh the decor on several of my pieces- including what I like to place on my coffee table. I almost always like to place a tray on my table to catch all the knick-knacks and remote controls (okay, chocolate-all the chocolate). I wanted to keep a tray on my table but the wicker one i’ve had all year long was, well, I’m bored of it lol. Enter the fabulous DIY Tiled Wooden Tray.
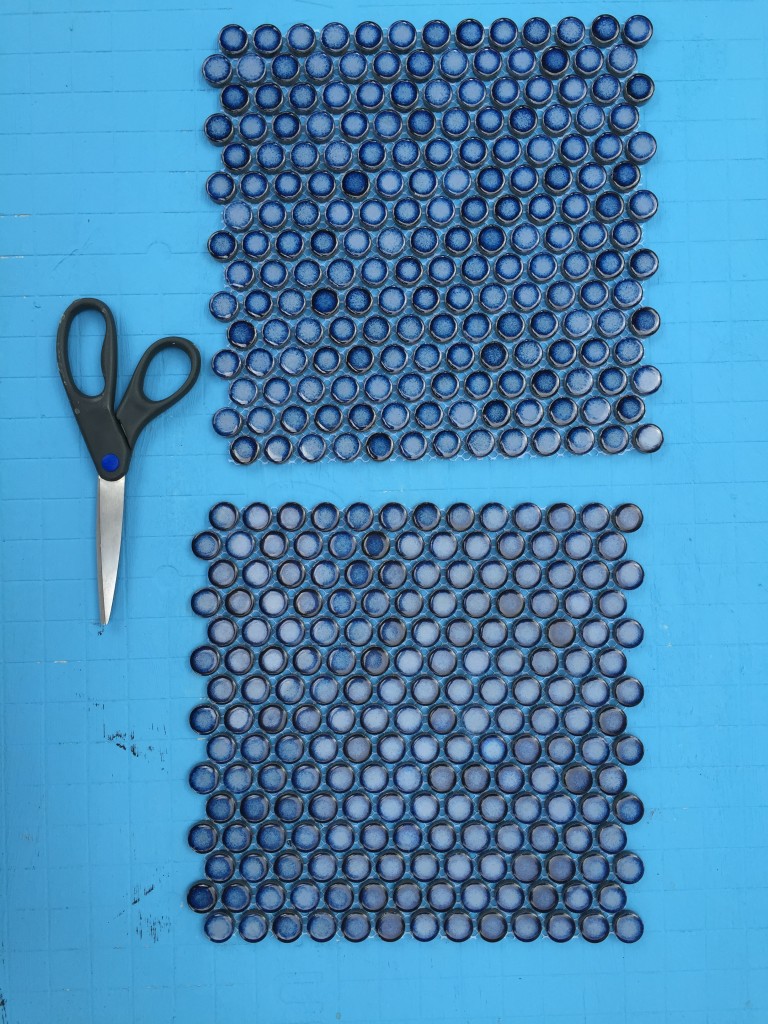
Earlier this month I went shopping with my parents at a bathroom tile store and I found a fabulous accent tile that I immediately loved. At $1.50 or so a sheet, I knew I wanted at least two sheets. I didn’t exactly know what I wanted them for but it was oh so pretty! And running my hands on it was fun. When I made the trek out to JoAnn’s and found the discounted wooden tray, I was like >ding<! The process was not as complicated as I thought and it turned out fab! Love it.
This is what you’ll need:
- wooden tray
- wood stain
- Q-tips
- small tiles
- caulking
- small bag of grout
- sponge
- small bucket/can to mix grout
To start off grab your small tile sheets and a tray. You can repurpose an old wooden tray or get an unfinished one like I did. Since it was unfinished the first thing I set out to do was stain it. I normally dislike staining unfinished wood since it seems to soak it up completely- but this one wasn’t as bad. As you can see, I’ve used this stain for a loooooong time lol.

The corners will be a bit of a challenge so take a Q-tip and go to town. It’ll make the process much easier.

After you stain according to instructions and let dry, grab those little tiles. My sheets were in squares as they always are, so I needed to make sure and cut them to fit into the tray. I knew I’d have a little extra room on either side of the tray since they didn’t fit exactly.
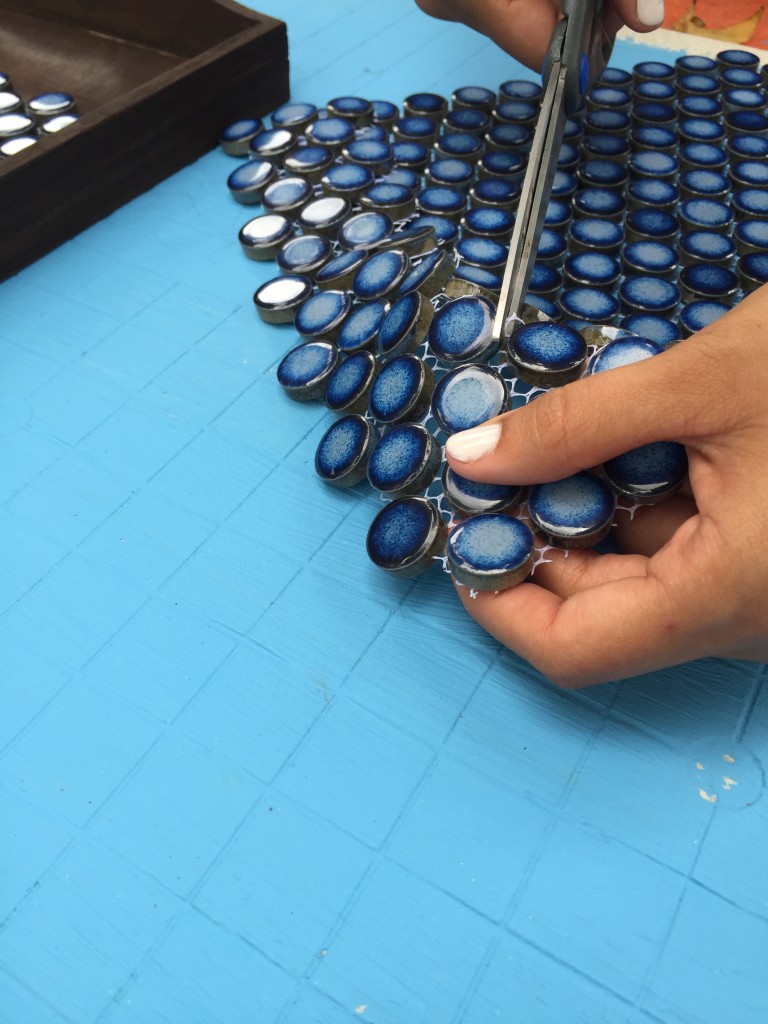
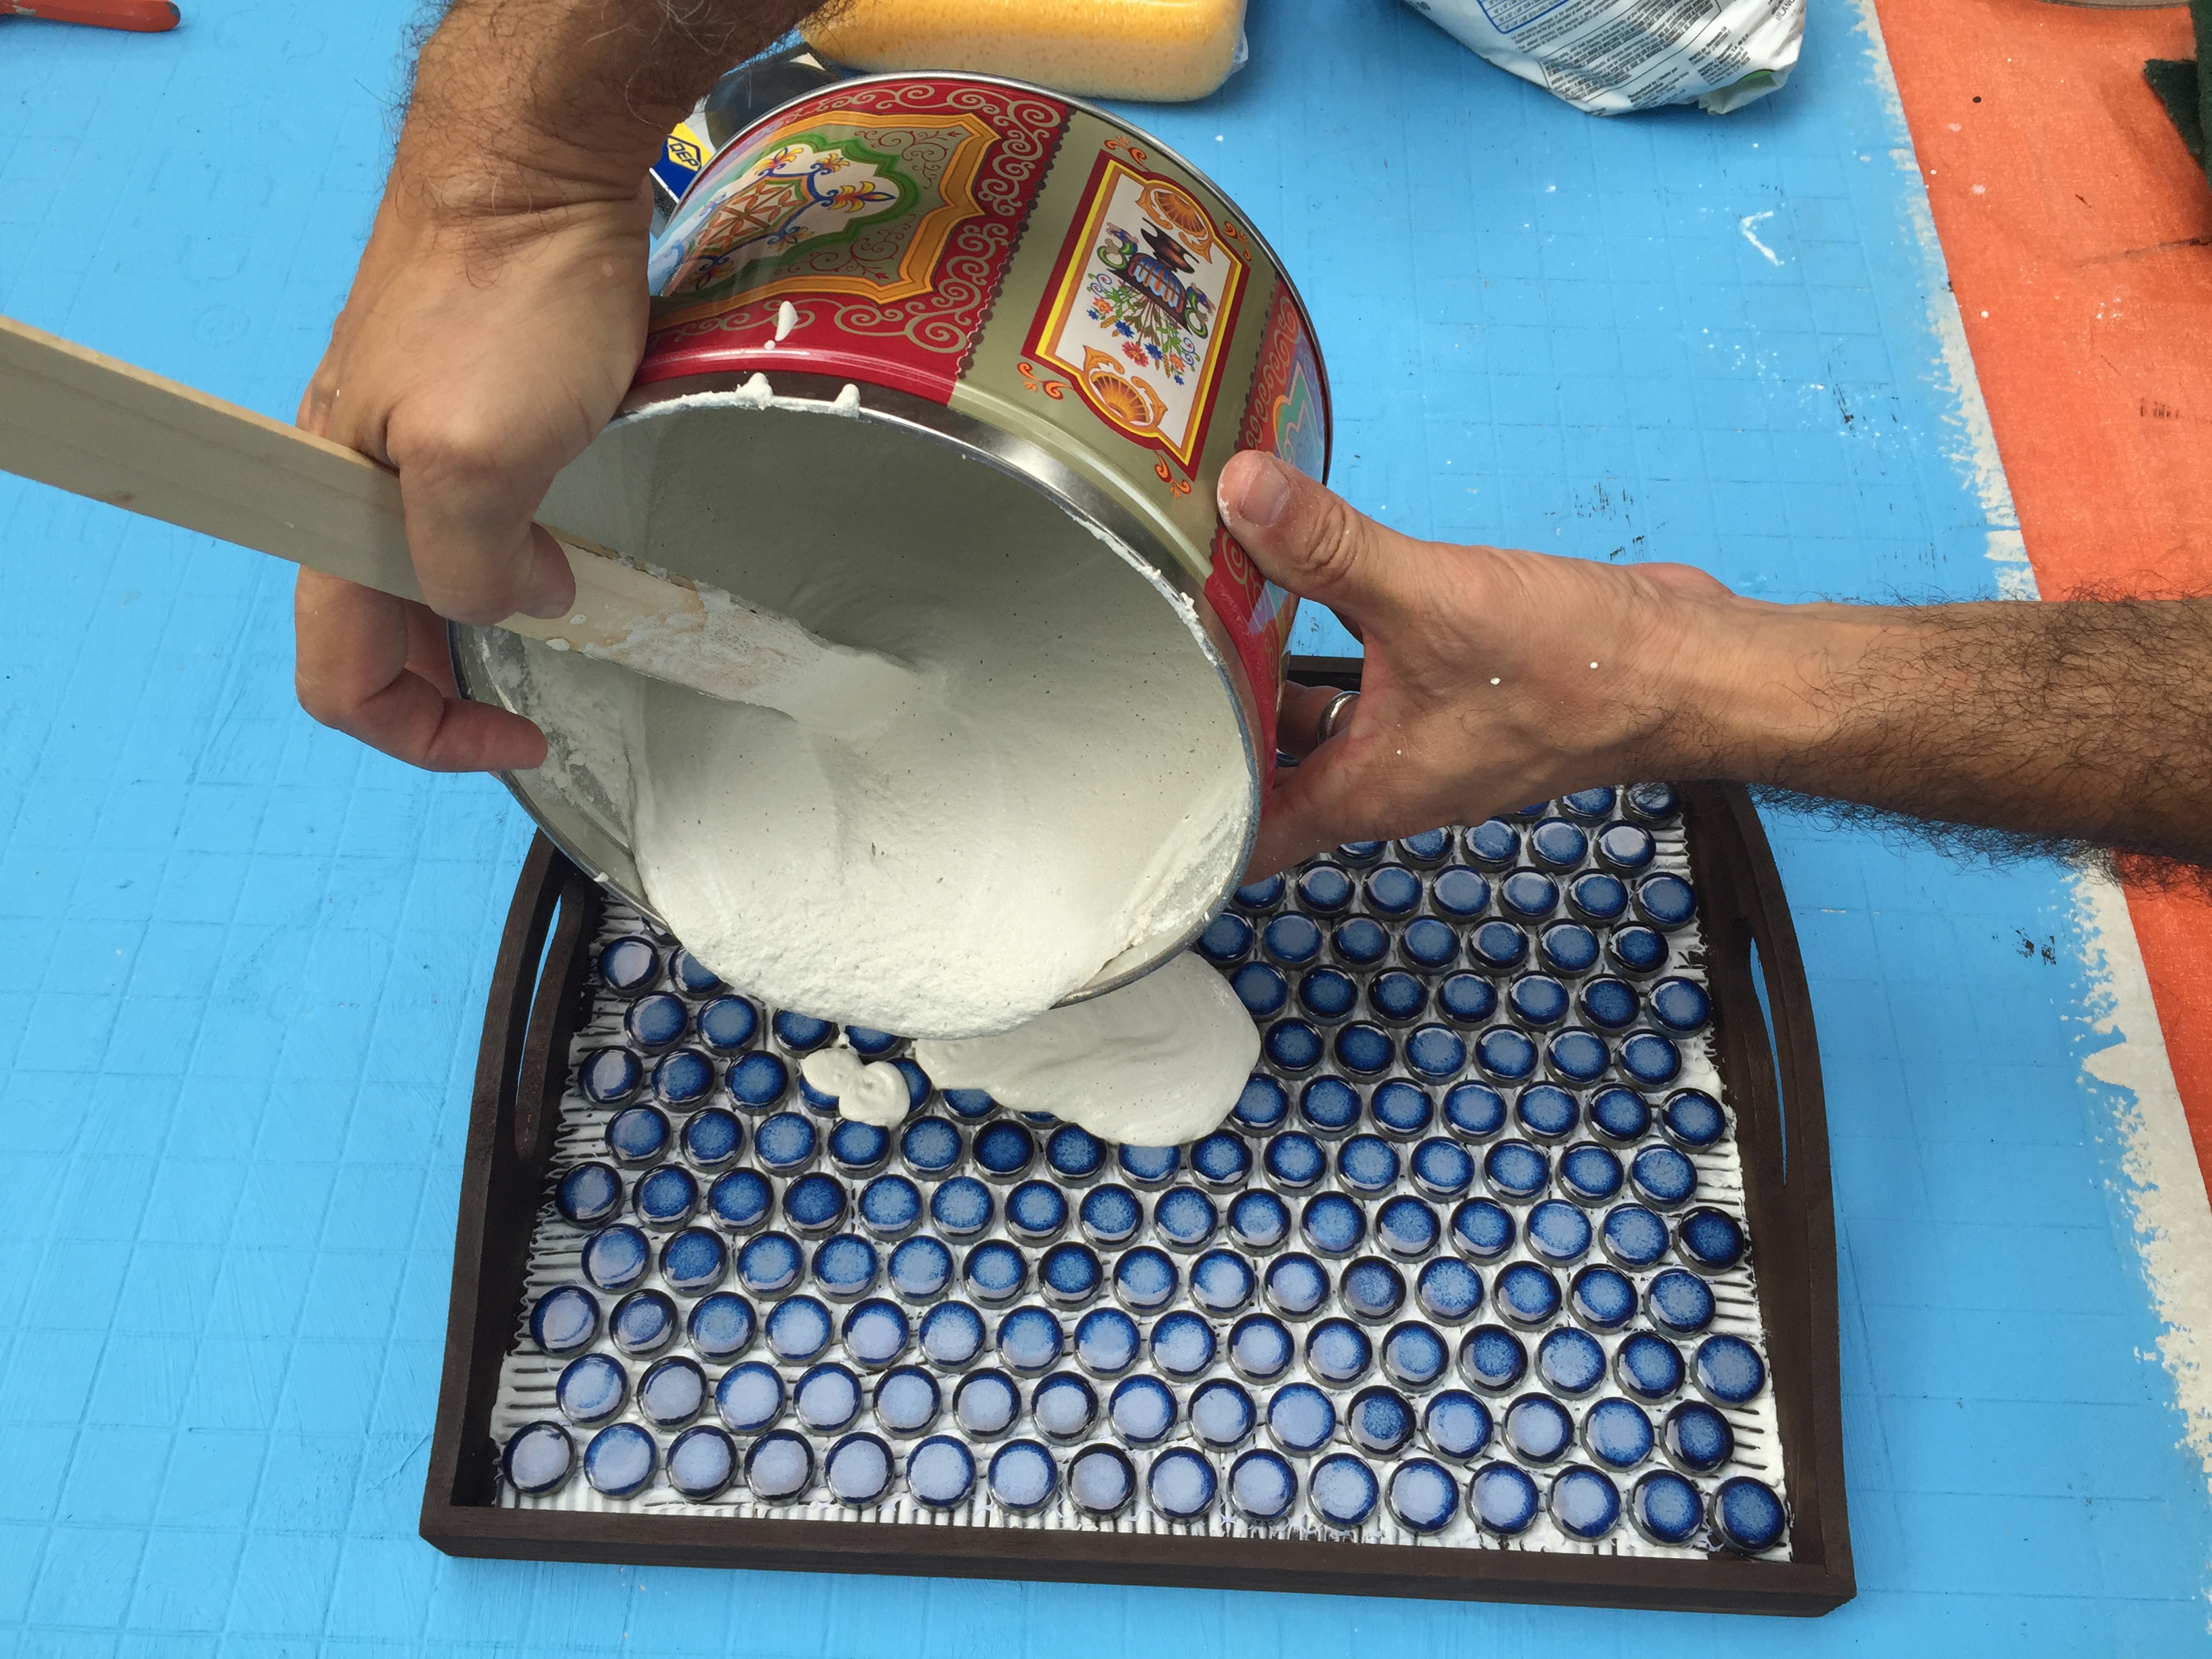
After you figure that out, grab that caulking. My dad I and decided that instead of regular glue to keep the tiles from moving, we’d use caulking. Wood, especially compressed wood, hates water. I opted to spread some caulking on the bottom instead of any tile glue or grout for the sake of keeping the wood as happy as possible. My caulking looks a little different but you can spread some on the bottom of the tray and scrape it out.

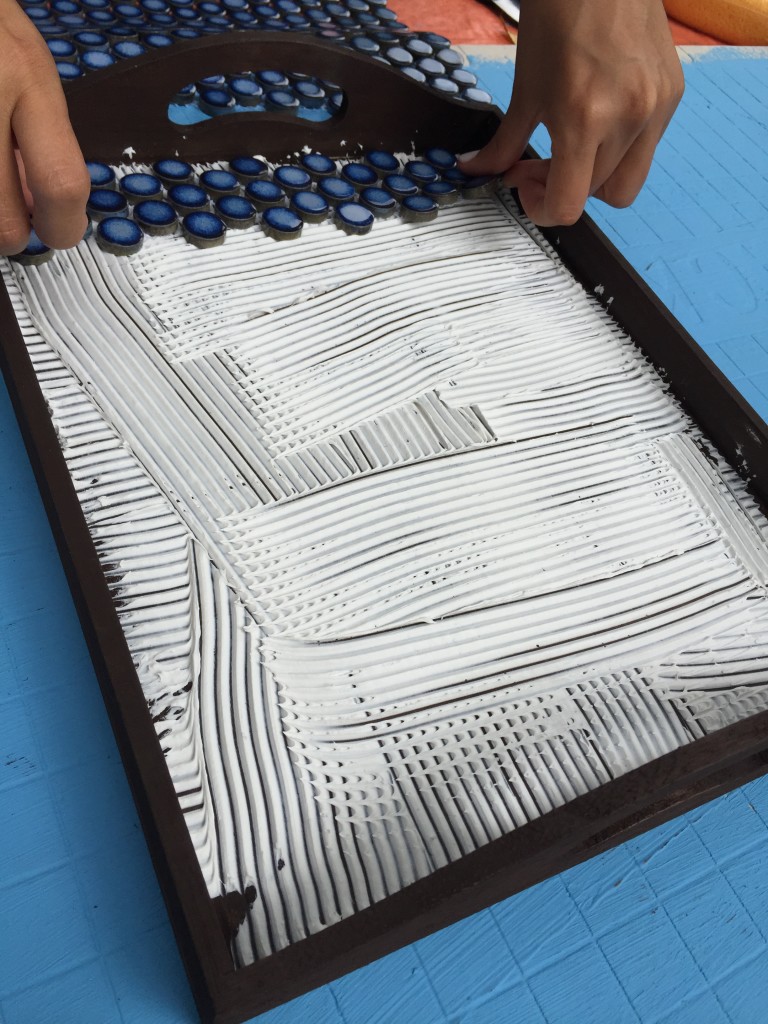
After, quickly add your tiles how you’d like them (with the wire backing and all). I placed a heavy book on top to keep the wood from buckling and bubbling and to reinforce the tiles. I let that dry for two hours outside.

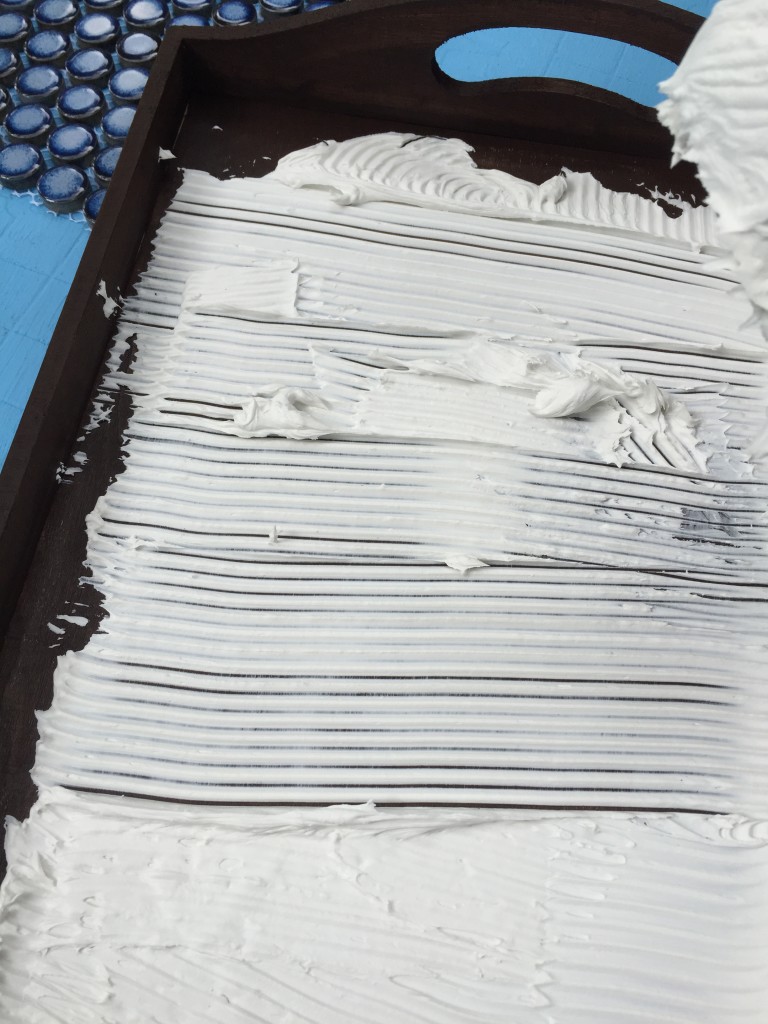
After you are sure that the caulking is completely dry, mix up a small amount of grout. I purchased a small bag of white grout at the home improvement store. They didn’t have anything smaller than that- but it was fine since I’m looking for other ways to use it 🙂 And thankfully my parents are re-tiling their bathroom so I’m able to use their supplies, hehehe.

Make sure you follow the instructions on making your grout mixture. As I often do, I winged it and it came out a tad runny. It really should be the consistency of whipped cream, if that makes any sense ha! Since we are using such a small amount, you can mix with your hands and a stirrer.

After I felt that it was mixed enough and not too many bubbles, I went ahead and poured some in. Like I said, mine was a little bit too runny, but for the purposes of this it didn’t matter. If it had been a real bathroom job, it would have been terrible! After pouring or scooping and placing on top of the tile, spread it out evenly like if you are icing a cake. Take care with the corners. I learned this the hard way. Since it’s such a small space be careful with the walls of tray; take care not to come up to high. You want the grout to come up to the edges of your tiles, but not more than that. It’s up to you how much you put in, however, you want it to be an all even surface.

Once you’ve done that, go ahead and scoop out the excess grout. Take your sponge (you’ll need a small one for this) and begin wiping down the tiles. Again, take care not to dig into the grout or to dig into the edges or sides. It’s easy to do so be careful!
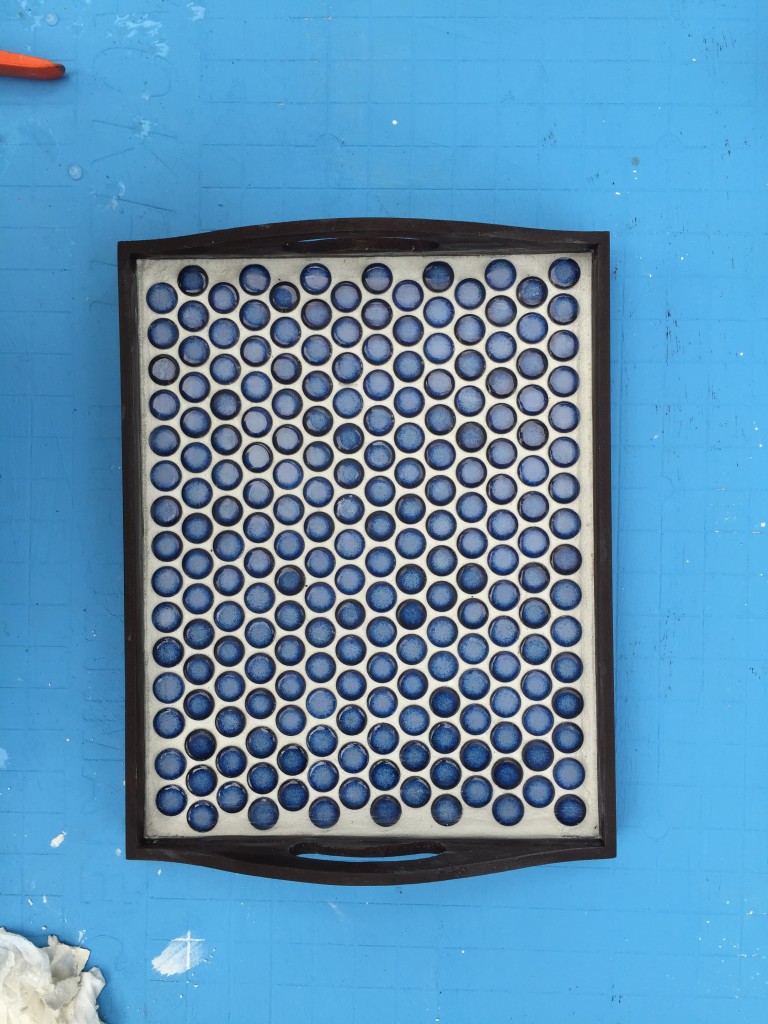
Next let it dry for as long as the instructions say. I left mine overnight outside. Once you are convinced it’s dry, it’s clean up time. I knew i’d left some edges that were a little rough so I took a small sanding block and sanded down the edges and sides of the board. I repainted where the tile and board meet with a straight line just for clean up. Let dry. I still felt like the tray needed a pop of color, so I painted the top edge of the tray and the insides of the handles with a gold acrylic paint.
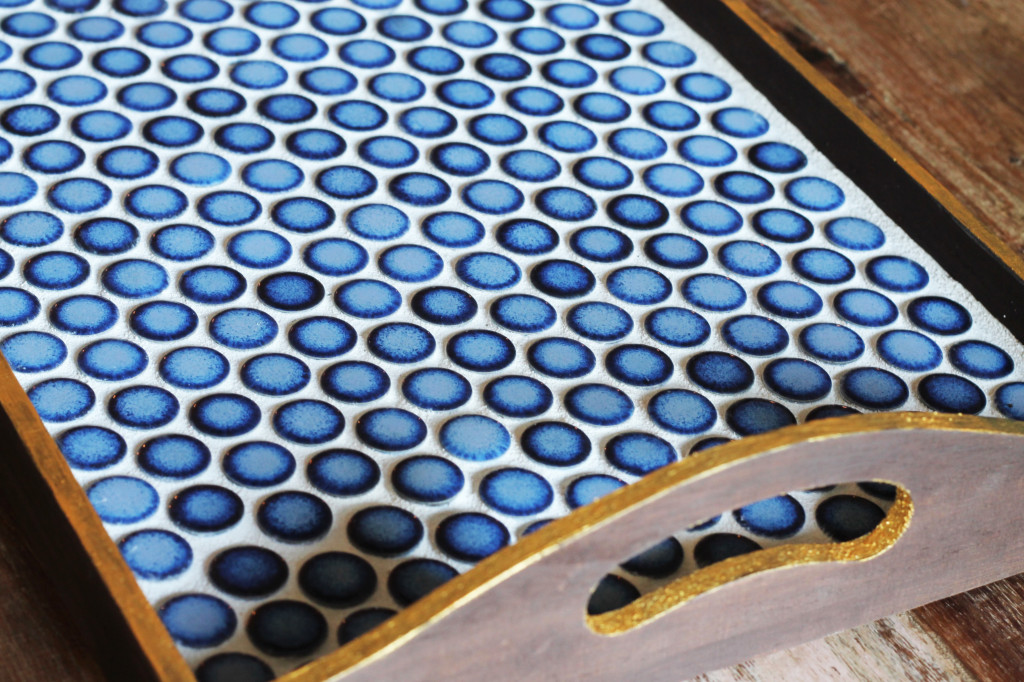
Feel free to paint any colors that match your tiles. After some hours drying, it was ready!

It’s perfect on my coffee table! I wish I could have a bathroom with this tile, but being a renter I’ll just settle for something small like this. And with this being my first experience grouting something wooden, it came out pretty good if I do say so myself 🙂
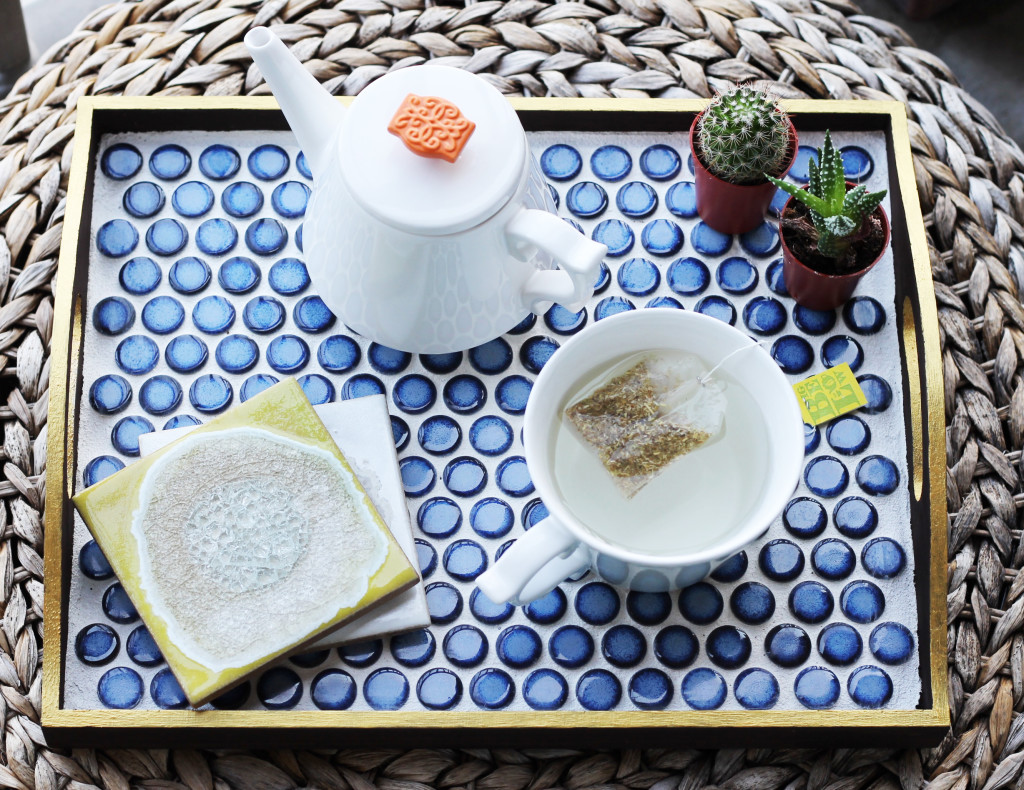
SO- what should we grout next?! If you do get to tile a tray, let me see it! Upload a photo! Anywho- have a great Hump Day!


 I made them out of polymer clay! And look how cute they came out as toppers! But you can also hang them as ornaments. The post is on the blog today :) .⠀⠀⠀⠀⠀⠀⠀⠀⠀
TBH I think my stomach's just happy they aren't real pastries.... lol OH and if you like mine just DM me about how you can buy one from meeee 🙋
.
.
.
#planoly #theeverygirl #chasinglight #peoplescreatives #realfolklife #makemoments #livethelittlethings #liveauthentic #pursuepretty #creativityfound #choosejoy #thatsdarling #craftsofinstagram #crafts #diy #makersgonnamake #ornaments #createeveryday #sculpey #polymerclay @sculpey_polyform @joann_stores")
 Or DM me about getting cards sent to you! ♥️ ⠀⠀⠀⠀⠀⠀⠀⠀⠀
⠀⠀⠀⠀⠀⠀⠀⠀⠀ #planoly #theeverygirl #chasinglight #peoplescreatives #realfolklife #makemoments #livethelittlethings #liveauthentic #pursuepretty #creativityfound #choosejoy #thatsdarling #craftsofinstagram #crafts #diy #makersgonnamake #createeveryday #christmascards #supportlocal #shopsmall #watercolor")
 I've made something just for you... 😏 Yesss, thas right it's a printable Paint-by-numbers!! 6 colors any way you want 'em. It's up on the blog today 🎨🖌️ !! I say we print a bunch and make it a party...🍷👩🎨 Sip and paint anyone???
⠀⠀⠀⠀⠀⠀⠀⠀⠀
⠀⠀⠀⠀⠀⠀⠀⠀⠀
#planoly #paint #paintbynumbers #printable #theeverygirl #chasinglight #peoplescreatives #realfolklife #makemoments #livethelittlethings #liveauthentic #pursuepretty #creativityfound #choosejoy #thatsdarling #craftsofinstagram #crafts #diy #makersgonnamake #createeveryday")

 and to plan some peace before the craziness of the holidays start!! 🙈 🦃🎄⠀⠀⠀⠀⠀⠀⠀⠀⠀
⠀⠀⠀⠀⠀⠀⠀⠀⠀ #planoly #theeverygirl #chasinglight #peoplescreatives #realfolklife #makemoments #livethelittlethings #liveauthentic #pursuepretty #creativityfound #choosejoy #thatsdarling #craftsofinstagram #crafts #diy #makersgonnamake #createeveryday #fruitofthespirit")
Love the tile you chose Cari! What a beautiful blue. Nice job!
Cari
Thanks Naomi! The blue pop makes all the difference 🙂
J
Hi Cari,
Is there a reason why you stained the bottom even though the tiles would be added?
Thanks
John
John
Hi Cari,
Is there a reason why you stained the bottom before putting tiles on it?
Thanks
John
Cari
Hi Jonn, Nope no reason! It’s def not necessary 🙂